Training and Zones
Train on the marked circle at a pull-up bar, then return to the throwing lane and watch the charge meter. Compare the landed zone before changing your equipped block.
Using the Charge Meter and Throw Control
Stepping onto the blue throwing platform activates the throw interface. A charging meter fills on screen while the Throw control is visible. In one recorded attempt, releasing the meter at 52% displayed a GOOD rating before the block traveled downrange. That 52% mark reflects a single observed throw rather than a guaranteed threshold for every rating.
When the block lands, the display shows the reached zone, such as Scorching Dunes, alongside a luck multiplier. The official game description states that the game includes 17 areas and that throwing farther increases the luck applied to your catch.
Pull-Up Bars and Training Progression
The official game description confirms that training on pull-up bars increases throw distance. Next to the pull-up bars, an on-screen prompt tells you to stand on the circle to train.
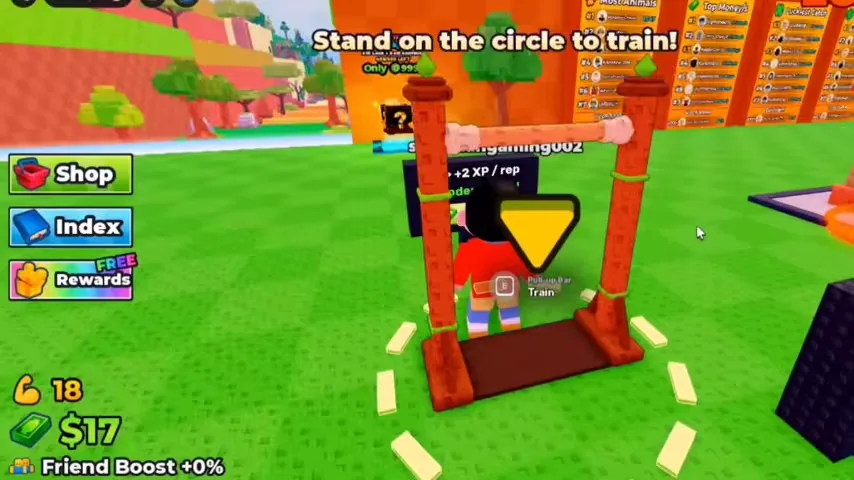
- Walk onto the glowing circle in front of a pull-up bar.
- Watch the training HUD track your current level and XP gain.
- Check the nearby training upgrades board to see when higher-tier stations become available.
- Press the visible Stop control on the training HUD whenever you are ready to step away and test a new throw.
If your character cannot move toward the throwing platform or the shop, verify whether the training HUD is still active and select Stop to exit the routine.
Choosing Between Training and the Lucky Block Shop
Distance from pull-up training works alongside the block you select in the Lucky Block Shop. Inside the shop interface, each card displays the block name, its tier, its cash price, and an Equipped tag on your active selection.
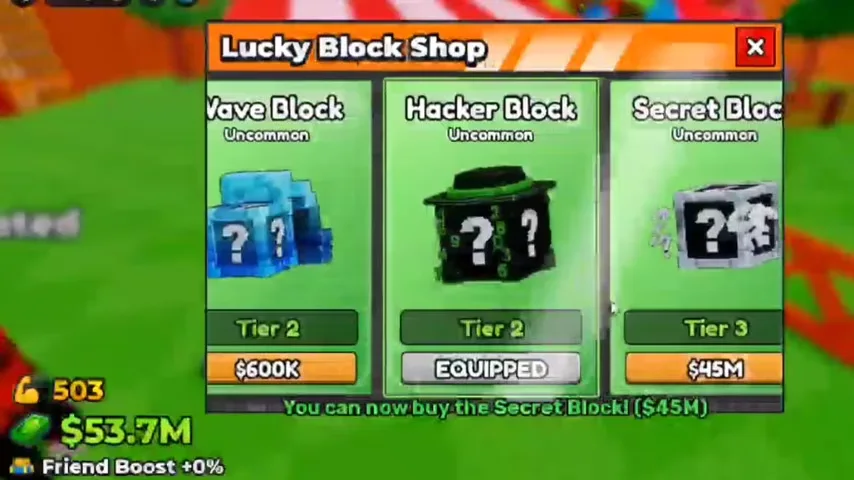
| Observed Shop Element | Recorded Examples | How to Use It |
|---|---|---|
| Equipped Status | Hacker Block shown as Equipped | Confirm your best purchased block is actually active before walking to the blue platform. |
| Block tiers | Secret and Planet show Tier 3, UFO shows Tier 4 in the recording | Read the shop cards for the current tiers and prices. |
| Distance and block choice | Training and shop equipment are separate controls | Train when you fall short of an area. Compare equipment at a similar charge. |
If a newly purchased block does not appear when you cross the yellow line, reopen the Lucky Block Shop and confirm that its card displays the Equipped label.